Requirements

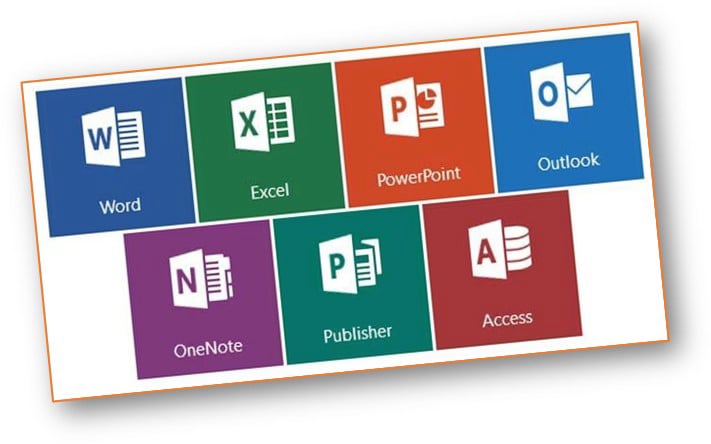
You need to have MS Access 2019 or later installed on your computer in order to run the program.

If you don’t have it , no worries : you can still download and install the MS Access Runtime from the Microsoft website for free.
Mobirise Website Builder

Where to Start


1.  Download and Copy the Zip file into your desktop.

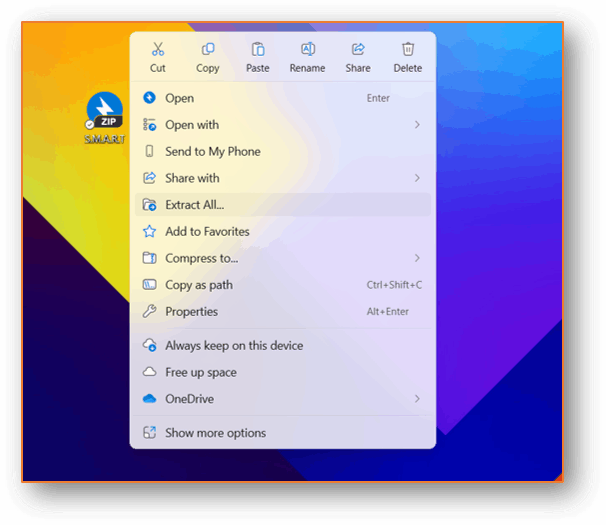
2. Extract the Zip file into a folder.

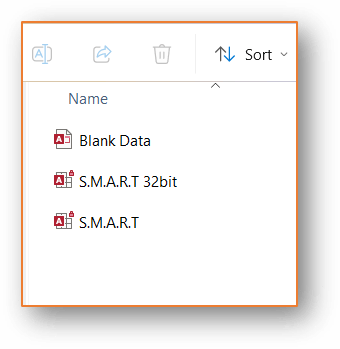
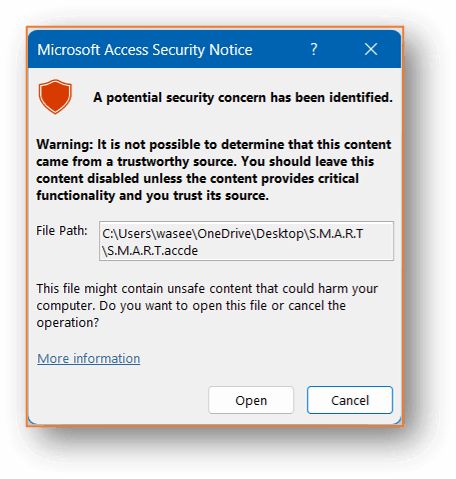
3. Run the S.M.A.R.T file ( or S.M.A.R.T 32bit ) depending on your MS-office version. 
Mobirise Website Builder
Start UP

1. Press Open on the Security Notice.
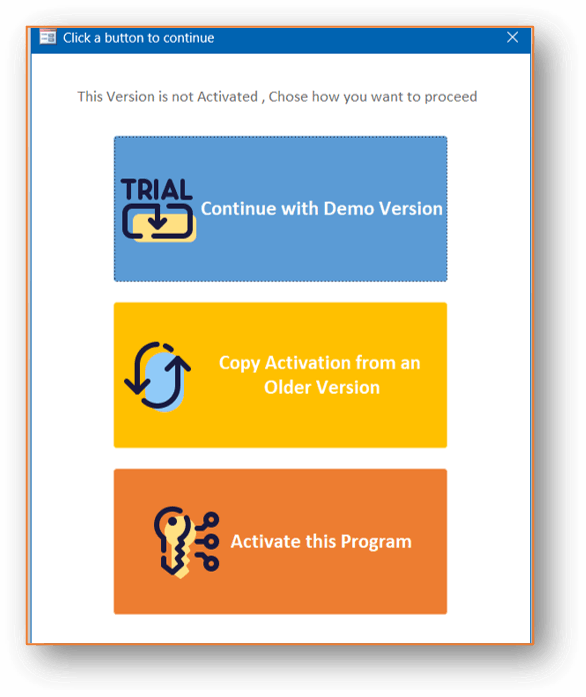
2. Chose one of the three options:

    a. Continue with Demo Version : Limited up to 25 entries.

    b. Copy Activation : use it if you are upgrading from another version already activated.

     c. Activate the program : request for activation code directly or via supplier.
Mobirise Website Builder


Activate the Program

Mobirise Website Builder


Mobirise Website Builder
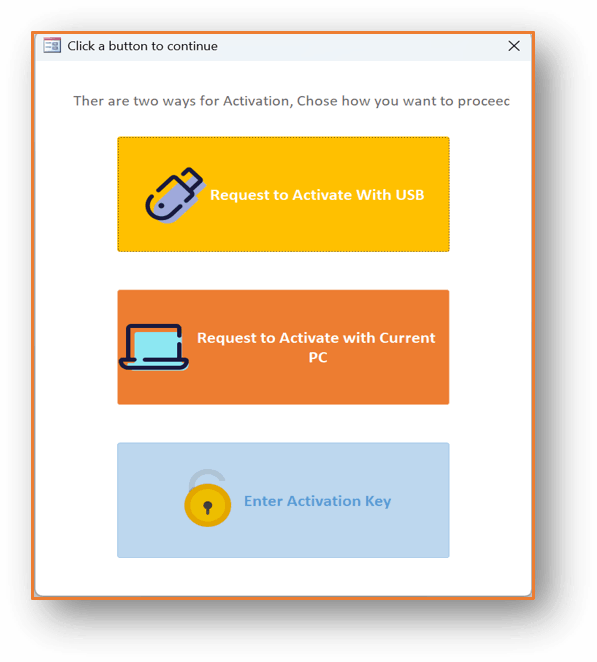
Choose one of the two options:

1. Activate with USB : insert a USB flash memory of your choice that will be used a key for the program and can be used on any PC.

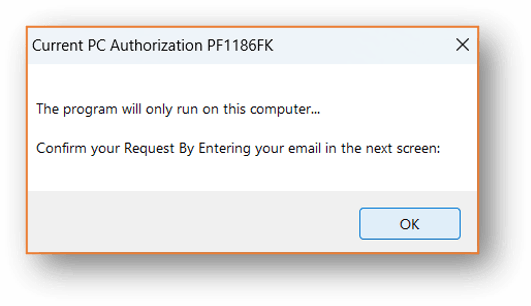
2. Activate with current PC : the program will be activated on current PC only.
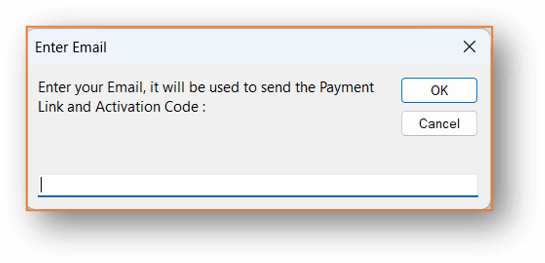
Either ways , you will copy and send the ID code provided and get an Authorization code to enter in the next screen.

Mobirise Website Builder

Choose "Enter Activation Key":
 
1.  Paste the activation code you received via email.
2. Your system should be activated.

First Run

Mobirise Website Builder
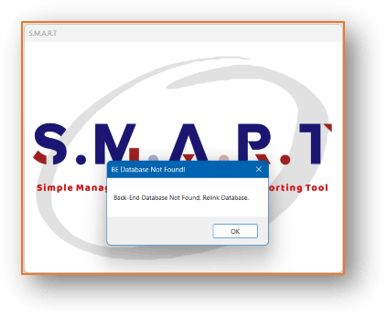
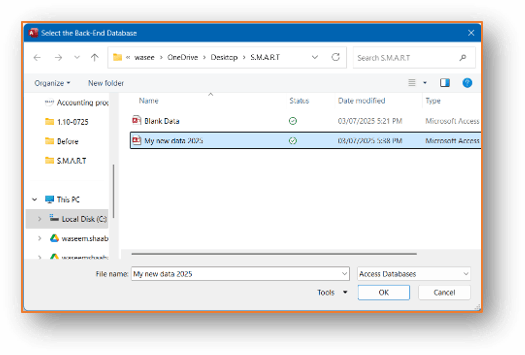
In the first run of the program, It will ask you to link a database.


Mobirise Website Builder

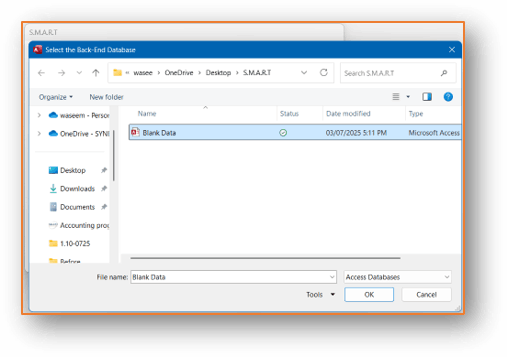
1. Press OK and Browse for the (Blank Data) that came with the program.

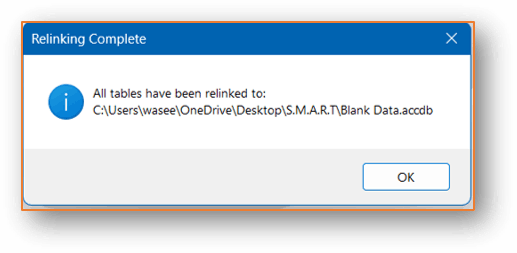
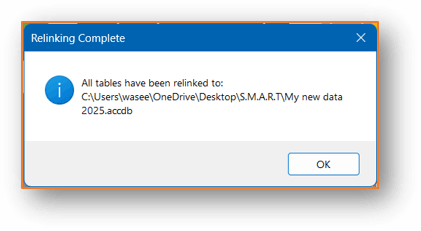
2. After selecting the data, it will give you a message that “all tables have been relinked” to the chosen data.

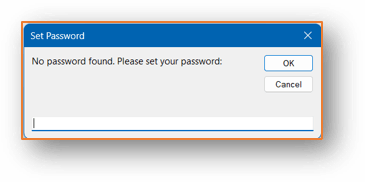
3. It will ask you to set a password , but no need to do at this point.


Mobirise Website Builder


Now you are good to go … 


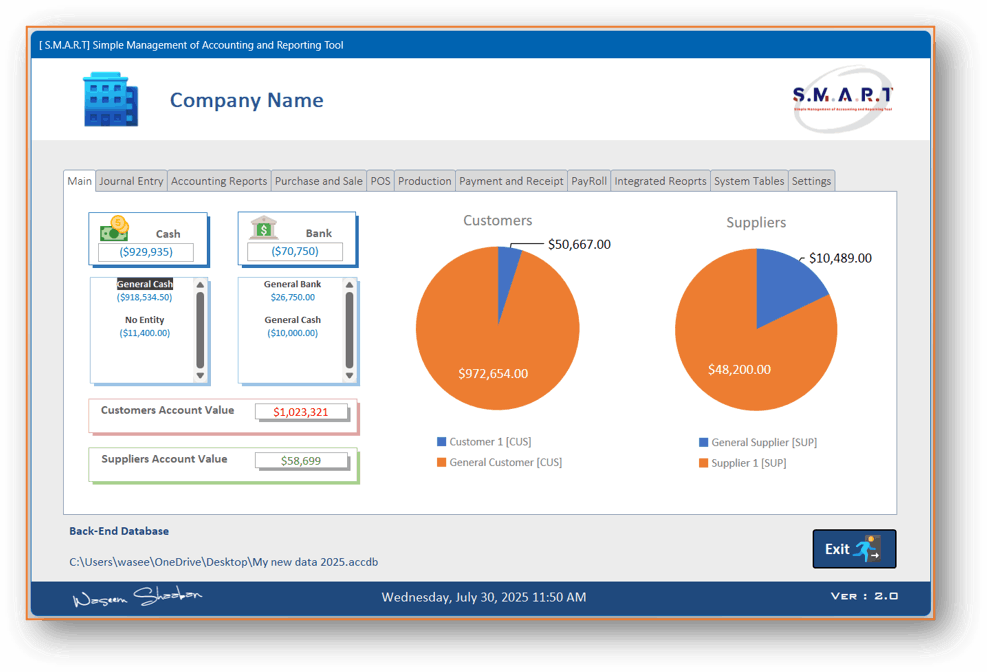
The Main Form

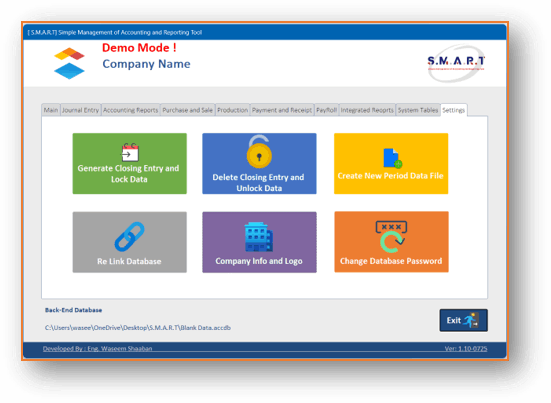
  • Demo Mode ! At the top if you are using the Demo version.
  • Your Company’s Name.
  • The Tabs of the Program: Main, Journal Entry, Accounting Reports, Purchase & Sale, Production, Payment & Receipt, Payroll, Integrated Reports, System Tables, Settings.
  • Direct Query values and Charts : Cash, Bank, Customer, Supplier.
  • The name and path of your Linked Database.
  • The Version Number.
Mobirise Website Builder
Create Your first Data

1. Go to the Settings Tab and press on Create New Period Data File.

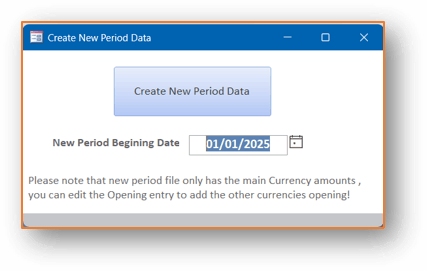
2. After confirmation , choose the date of the new period beginning and press the button .

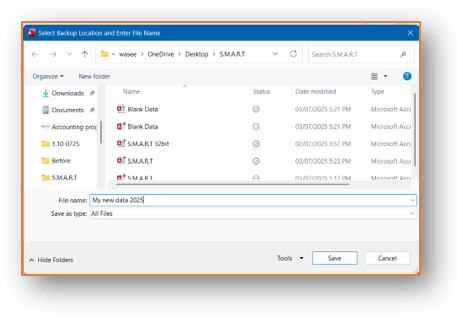
3. select the name and location of your new data and press save.

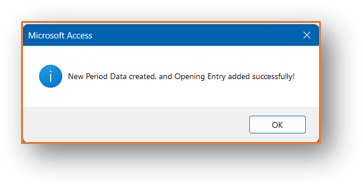
4. A message of successful creation of the new data will show.

Mobirise Website Builder
Link your Data
1. Go to the Settings Tab and press on :
Re-Link Database.


2. Choose the Data you created and press OK.

3. A message of successful Link of the new data will show.

4. Set a password for your data and continue.

You are ready now to work on the program with your Data.

Mobirise Website Builder
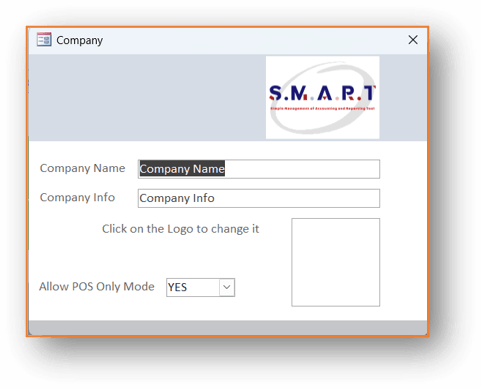
Add your Company’s Info


Mobirise Website Builder
1. Go to the Settings Tab and press on: Company Info and Logo.

2. Add your company’s details

3. Click on the empty square to browse and choose your logo.


Set up the main variables

Go to the System Tables tab
& Start adding your main variables depending on your needs.

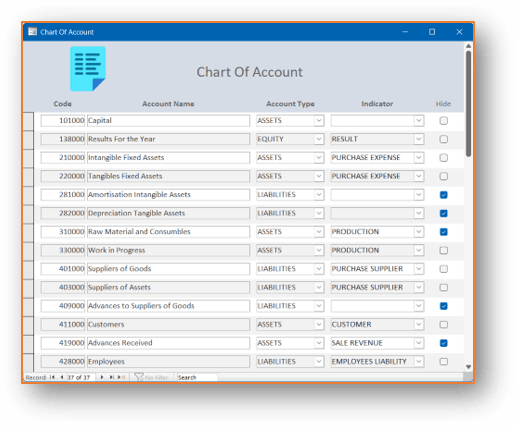
  1. Chart of Account
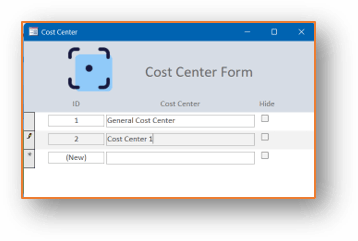
  2. Cost Center
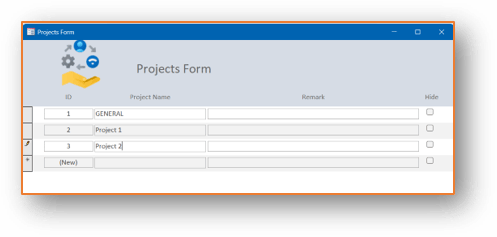
  3. Projects
  4. Entity
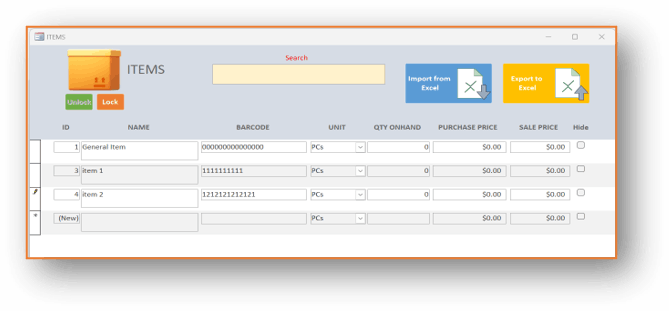
  5. Items
  6. POS Profile
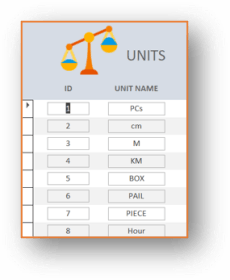
  7. Units
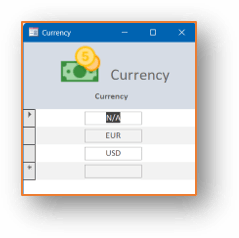
  8. Currency
Mobirise Website Builder

Chart of Account


1. Go to the System Tables tab 

2. Press on Chart of Account.

3. You may add accounts , hide them and change the name or kind of the account.

4. The Indicator field will reflect on how the program will treat this account in reports and dropdown boxes.

If you are not an accountant or you are not familiar with this process, please leave it as it is. 
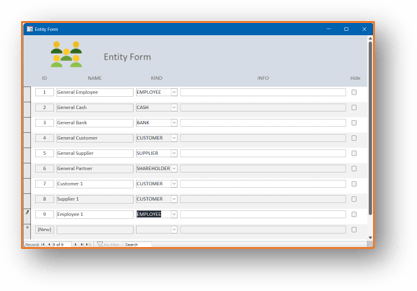
Continue to other System Tables

In System Tables tab
Add all the data you need to start with the entries.
No worries , you can do this at any point you like and even you can do it during the entry.
Mobirise Website Builder

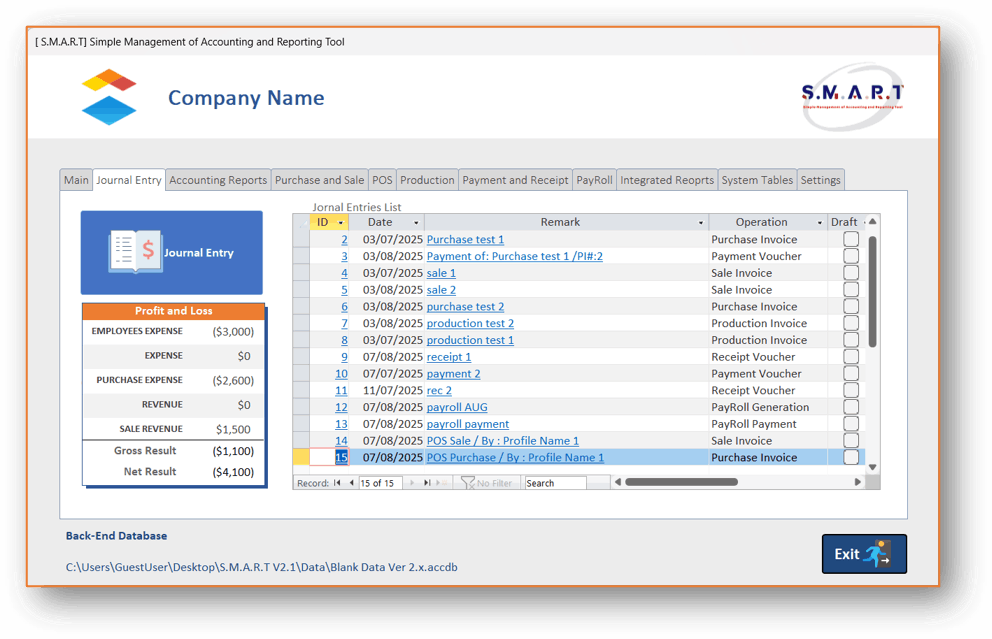
Journal Entry Tab

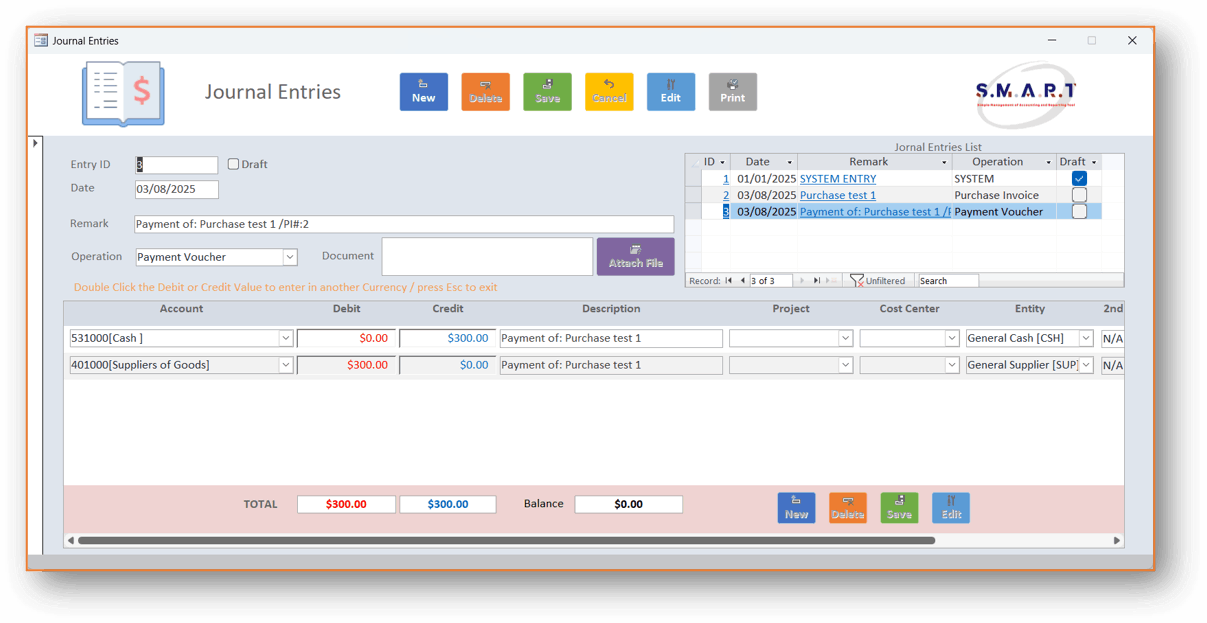
  • Journal entry Button : to add and edit (GENERAL) Journal Entries.
  • Quick ( P & L ) Report.
  • Journal Entries List : where you can navigate through the Journal Entries and view them by clicking on the ID or the Remark .
Mobirise Website Builder

Journal Entry

In Journal Entry Tab click on Journal entry Button to add and edit (GENERAL) Journal Entries. 
Mobirise Website Builder

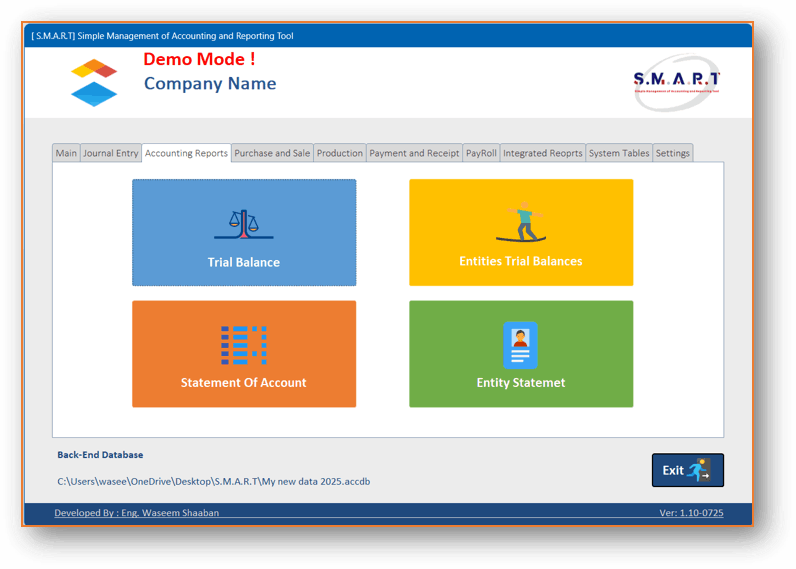
Accounting Reports Tab

  • Trial Balance.
  • Entities Trial Balances.
  • Statement of Account.
  • Entity Statement.
Mobirise Website Builder

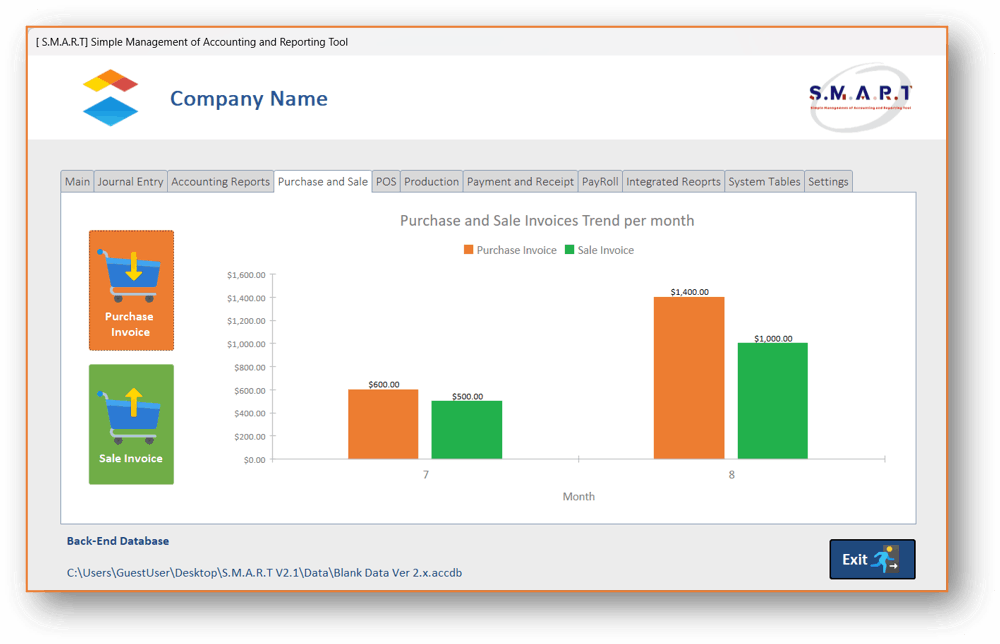
Purchase and sale Tab

  • Purchase and Sale Chart.
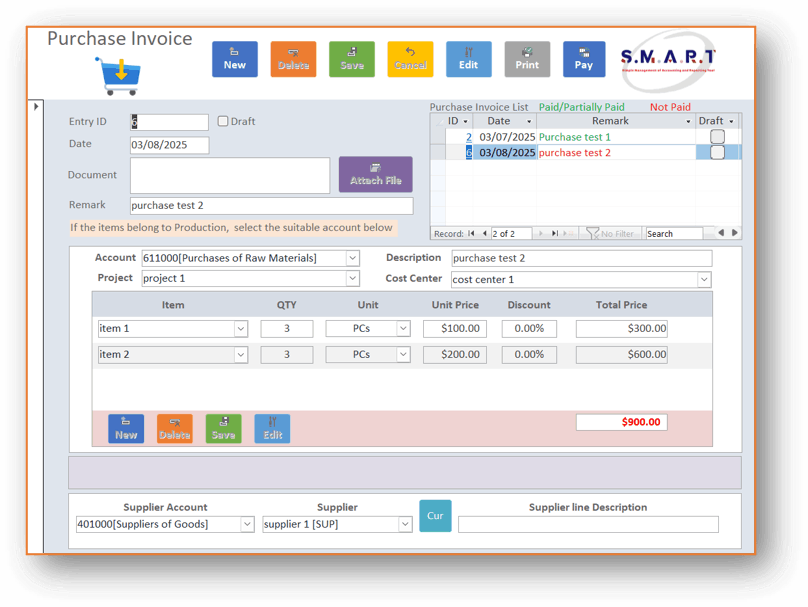
  • Purchase Invoice Button.
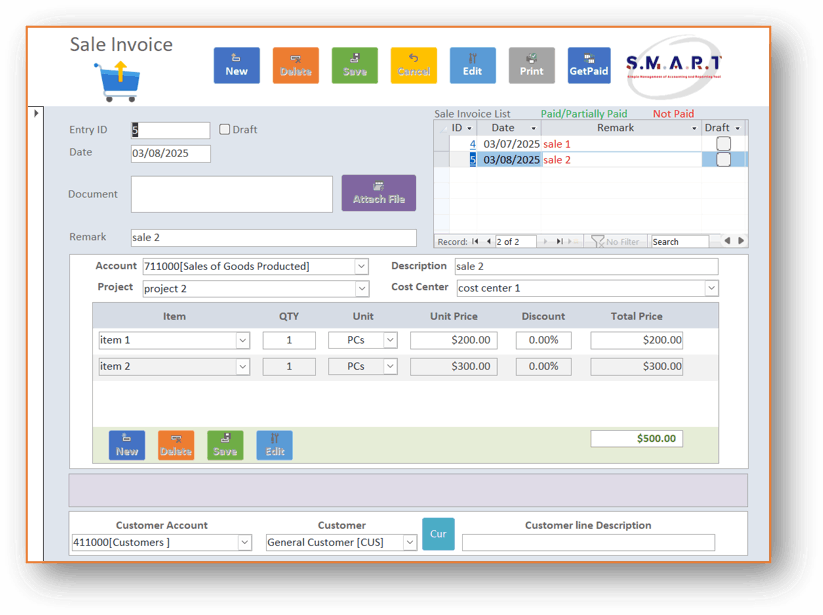
  • Sale Invoice Button.
Mobirise Website Builder

Purchase Invoice
& Sale Invoice

Mobirise Website Builder

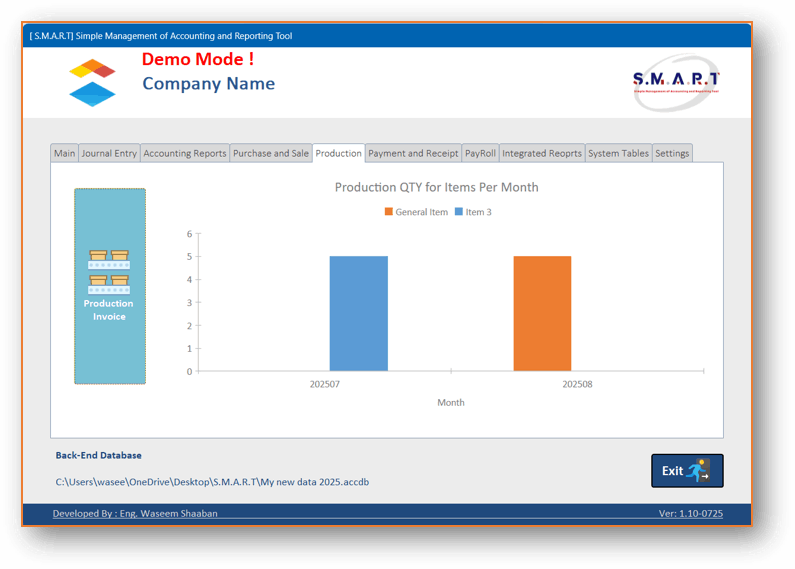
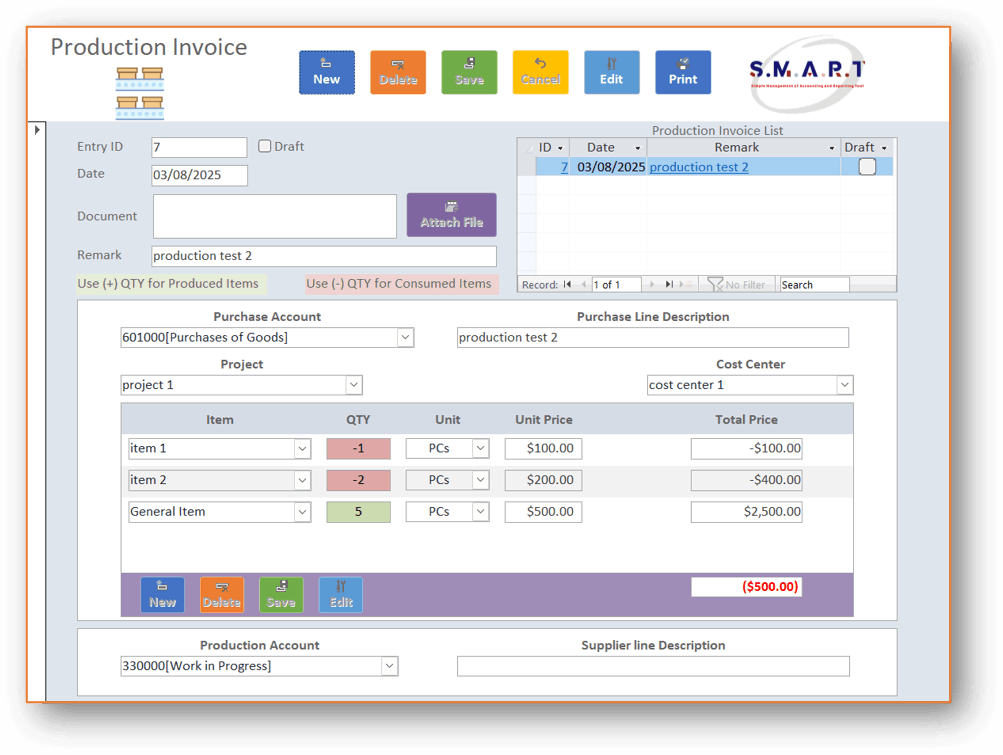
Production Tab

  • Production Quantities Chart.
  • Production Invoice Button.
Mobirise Website Builder

Production Invoice

Mobirise Website Builder

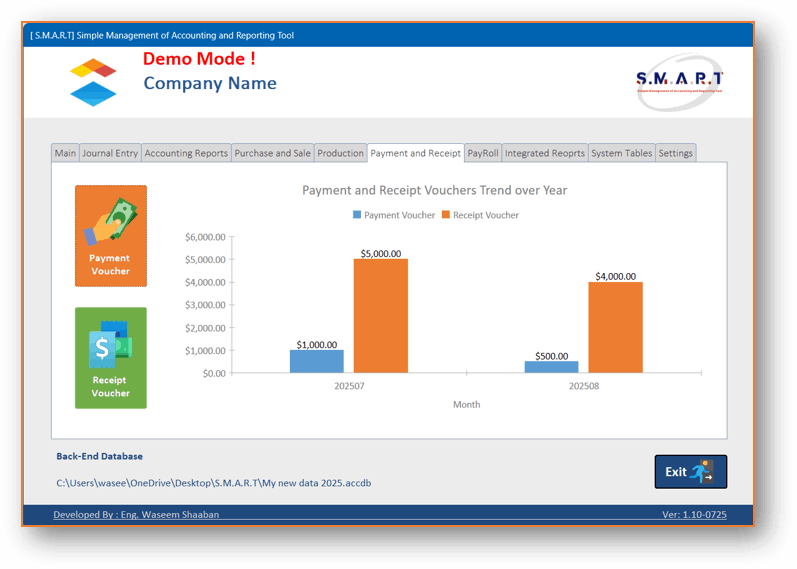
Payment and Receipt Tab

  • Payment and Receipt Vouchers Chart.
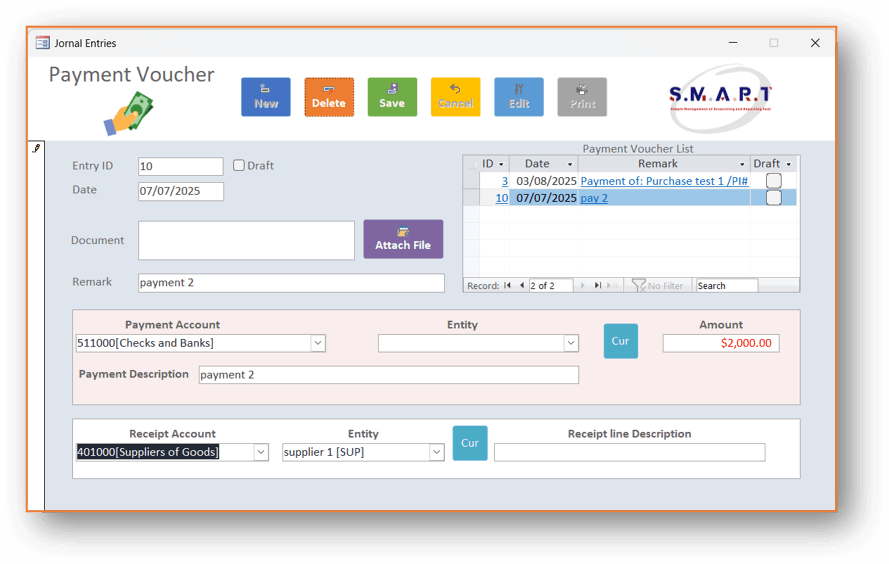
  • Payment Voucher Button.
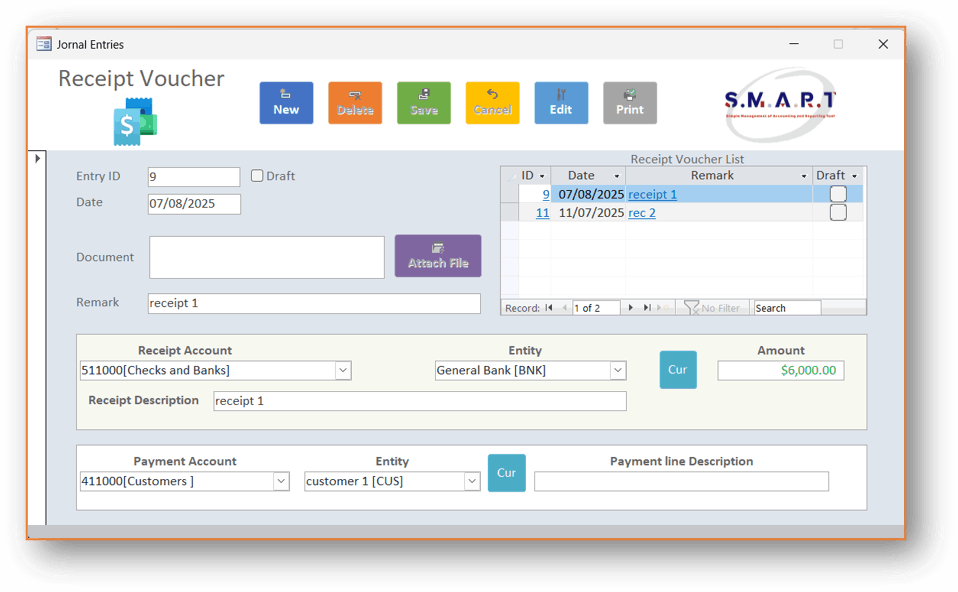
  • Receipt Voucher Button.
Mobirise Website Builder

Payment Voucher
& Receipt Voucher

Mobirise Website Builder

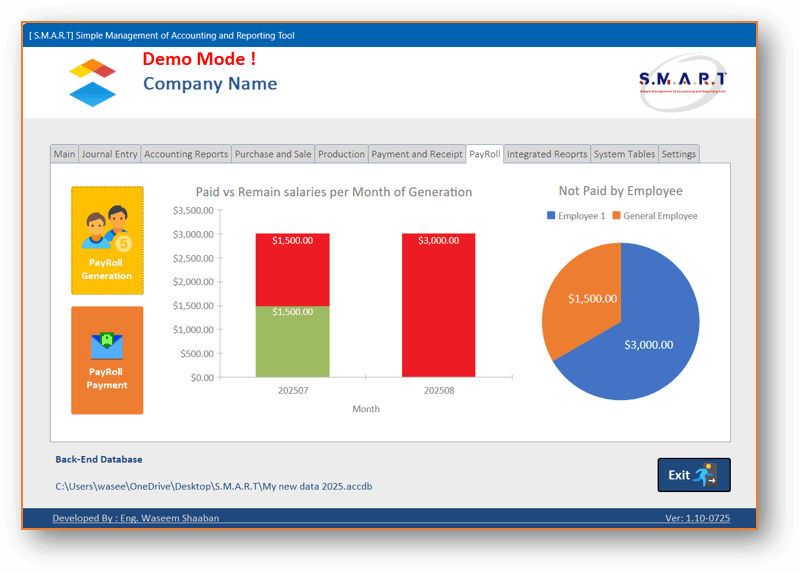
PayRoll Generation and Payment Tab

  • Paid VS Remain Chart.
  • Not Paid Employee Chart.
  • PayRoll Generation Button.
  • PayRoll Payment Button.
Mobirise Website Builder

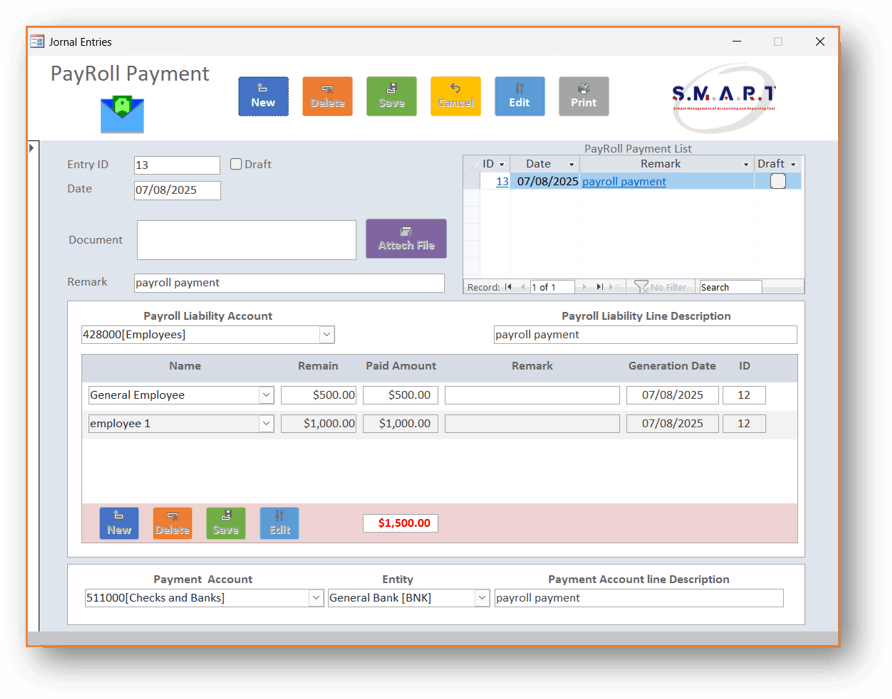
PayRoll Generation
& PayRoll Payment

Mobirise Website Builder

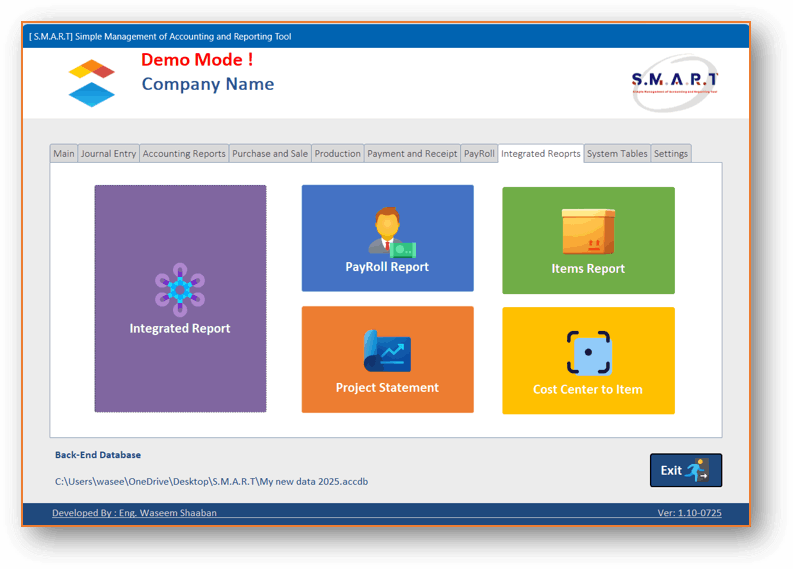
Integrated Reports Tab

  • Integrated Report.
  • PayRoll Report.
  • Items Report.
  • Project Statement.
  • Cost Center to Item.
Mobirise Website Builder
POS Tab

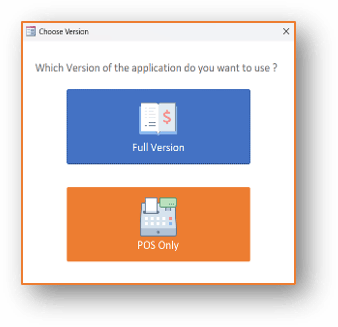
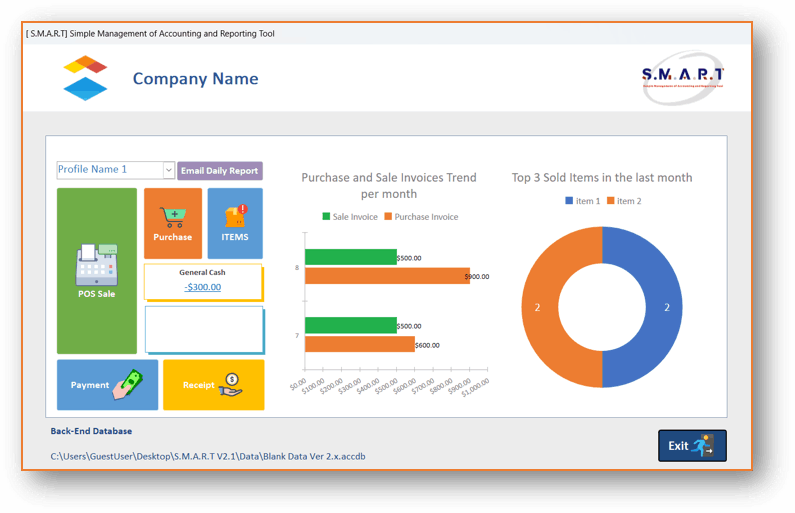
By choosing the “POS only” application, you will be provided with: 
Mobirise Website Builder
1. Profile Name

2. Buttons: POS Sale, Purchase, Items, Payment, Receipt and email Daily Report.

3. Your profile’s cash balance and today’s Sales.

4. A donut chart highlighting the top 3 sold items in the last month

5. A bar chart comparing monthly purchase and sale invoice.


POS sale
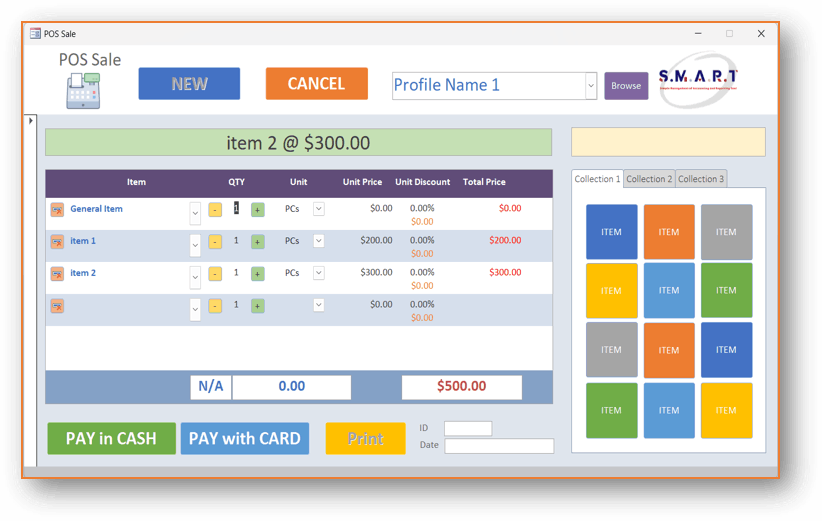
POS Sale form where you can sell with either Barcode reader , programmed buttons of items or just by selecting the desired item.

Then you may execute the payment by cash or a card and print the receipt on the thermal invoice printer.

Mobirise Website Builder
POS purchase


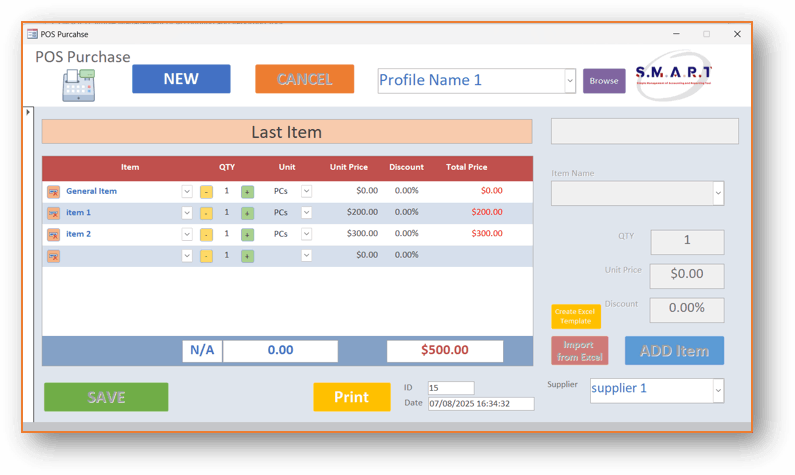
POS Purchase where you may enter the purchased items either by the barcode reader or by importing them from an excel file.

Mobirise Website Builder

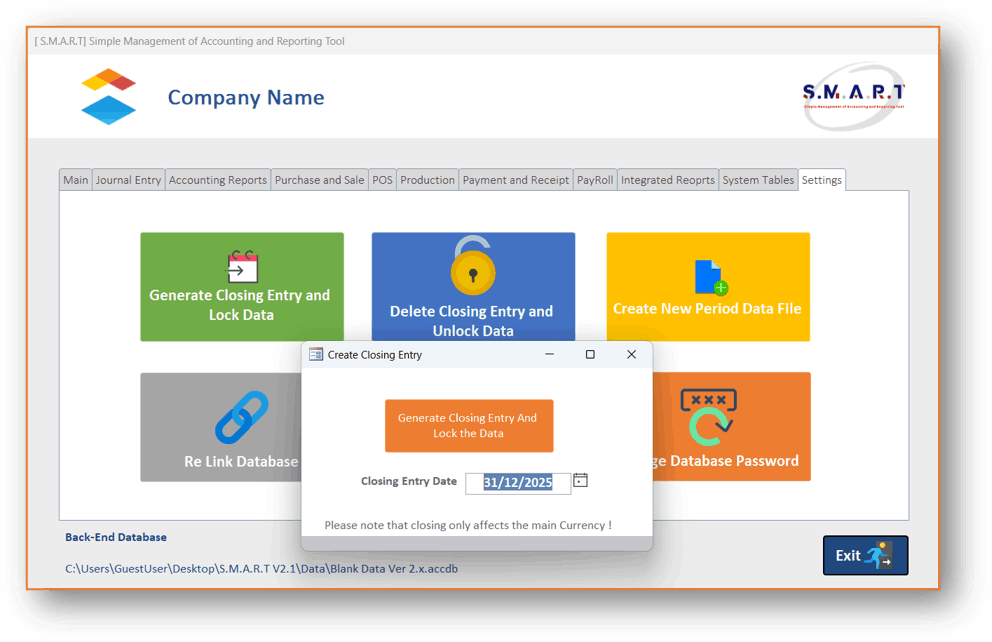
Generate Closing Entry

At the end of the year, ( or the desired period ) you can create a closing entry and then create a new period data file. 
Mobirise Website Builder

© Copyright 2025 S.M.A.R.T
All Rights Reserved.

Drag and Drop Website Builder